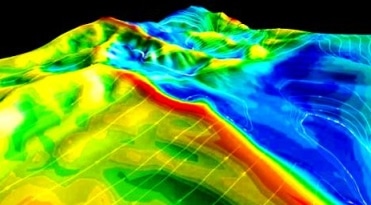
Here are 10 drone 3D photogrammetry and photogram tips for the beginner or anyone using their drone to create 3D models, photogrammetry maps and Digital Elevation Models (DEMS).
What is great about creating 3D photogrammetry images is that you don’t need any special sensors on your drone. Just a normal camera.
Now, to create great 3D photogrammetry models and maps (output) you need to collect accurate clear photos (input). So a quality drone and camera is essential, along with quality 3D software to mesh your photos together.
For real geological surveying, you need a high quality camera which can take photos at exact intervals of say 0.5 or 1.0 second intervals. You also need a drone which has the best gyroscope, IMU and controllers to fly smoothly. It is also very beneficial if your drone has waypoint navigation.
This article has some excellent drone photogrammetry tips which will help you create some terrific 3D models, maps and DEMS. We’ve included some videos and also a link to where you can find 3D photogrammetry software applications which is also very important. For more information on this subject, read this introduction to photogrammetry and lidar.
In the below 3D photogrammetry tips, the Mavic Pro, which is the latest drone from DJI was used. It flies super smooth indoors and outdoors. The Mavic when flying outdoors has a number of intelligent flight modes and collision avoidance sensors which makes it an excellent choice for your aerial photogrammetry work.
There are very few drones on the market which you can use to fly around sculptures indoors and create 3D images. The Mavic Pro is a great option for this type of work. You can read more on the Mavic Pro features here.
Another top drone which has everything you need for photogrammetry and professional filming in the DJI Phantom 4 Pro. It has a 4k camera, excellent stabilization and many intelligent flight modes.
There are tremendous opportunities for anyone who is able to create professional 3D photogrammetry models and photogram images. With a quality drone, the right software and some practice, you too can become a 3D photogrammetry and photogram expert.
10 Top Drone 3D Photogrammetry Tips For Beginners
By Craig Schwartz.
Ever since I got my drone, my photogrammetry work has just soared to a whole other level. My photograms used to be poor quality because they were made from only a couple of dozen or so photographs, but now it’s easy and fun to capture hundreds or even thousands of photos if I need.
The results have been of the highest quality. The onboard machine vision sensors in the DJI Mavic drone mean I don’t have to worry about crashing into things.
Specific 3D Photogrammetry Tips
1 – Quality Equipment Produce Excellent 3D Maps and Models
Use a top quality drone and if working from the ground use a quality tripod. Blurry or inconsistent photographs will result in bad photograms and models. Drones and tripods produce good, stable photos. You can also use a drone for low to the ground shots and also for taking photogrammetry stills around sculptures in a room.
2 – Watch Your Shadows And Light
Lighting is very important. The textures on your meshes will be “baked in”, and so will any shadows. Keep your light uniform and flat. If you’re shooting outside, the best times to shoot are on overcast days, or when the sun is overhead. Stay out of the rain. Rain doesn’t play well with photogrammetry. Most drones are not waterproof.
3 – Be Efficient With Your 3D Project
 If you’re 3D photogrammetry project is outside which most are, then time is of the essence. Take too long capturing your scene or object and you will notice inconsistent, “streaking” shadows caused by the movement of the sun across the sky. Plan your project so when it comes to flying and taking your photos you are well prepared and know exactly what you want to accomplish.
Streaking can also confuse the photogrammetric algorithm, which can result in holes or deformities in your mesh. Worse still, if the shadow irregularities are too severe, the photogrammetric processing may just fail entirely.
In the beginning and learning about photogrammetry choose subjects which play to photogrammetry’s strengths and avoid its weaknesses. Stone, wood, simple fabrics, distressed or worn leather, cast and weathered metal. Photogrammetry loves these materials. Basically, anything not moving, dull surfaced, and topologically varied should work.
Avoid
- Objects with lots of flat, uniform or highly regular surfaces, right angles and straight lines
- Highly shiny surfaces like glass, polished metals, glossy plastics, or liquids
- Inconsistent lighting or shadows
- Lens flares or other visual artifacts in your photos
- Overly complex object
- Highly obstructed objects – if a lot of stuff is in the way of the object you’re trying to capture, it’s going to be difficult to get good results
4 – Think Spatially
Make sure to get all your angles. It’s not great having to start a project from scratch because you forgot to take enough photos of a landmass or the top of something, or failed to get any of that one piece which jutted out in that weird way. So plan well. When it comes to creating 3D photogrammetry of say agricultural land, fly over the area a couple of times if you need to. Use waypoint navigation as this will mean that you cover the landmass in a structured way.
5 – HDR Mode
If your camera supports HDR mode, use it. Don’t use the zoom function. Auto focus is OK. HDR stands for High Dynamic Range. It works to balance the shadows and highlights of a photo so that neither are being favored or ignored. This is done by combining three different exposures into a single shot.
6 – Camera Filters
Carry a circular polarizing filter for your lens at all times for outdoor photography. It gives you a little more leeway in dealing with specular such as mirror reflection from water or sunlight off objects. You can read more in this article entitled lens filters for aerial photography.
7 – Plenty of Overlap To Mesh Photos
Make sure your photographs have plenty of overlap. Overkill is OK. I get good results with photos taken at intervals of between 8 to 14 degrees. This means you’ll have about 26 to 45 photos as you make a single 360 degree revolution around an object. When it comes to aerial photogrammetry of land, many operators capture photos at 1 second intervals.
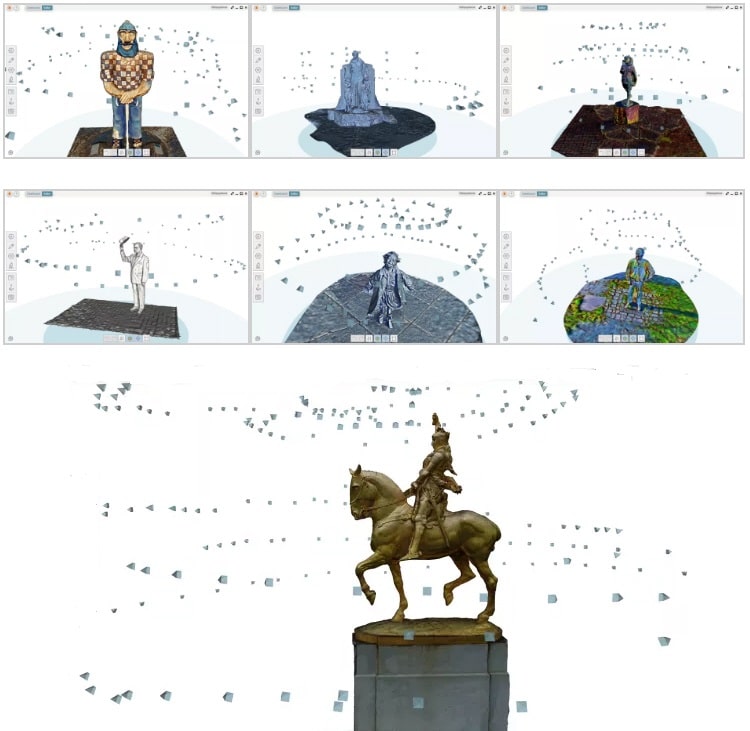
8 – At Least 3 Revolutions For Objects And Sculptures
You probably want to make more than one revolution around an object. A good rule of thumb is one revolution rotating around the center of an object, one revolution from at or near the base of the object, one revolution at or near the top of the object and a few from above (and below,when possible).
A few more for coverage of those hard to reach places and even a few more for details that you really want to call out on your mesh.
In the below images, you can see the points where all the photographs which comprise these photograms were taken. Those three platonically ideal rotations around your object generally give way to something a little more scattered looking. That’s OK.
9 – Take The Right Number Of Photographs
ReMake photogrammetry software can accept up to 250 photographs. Complex scenes or objects may require that many or more, but be aware that having a large amount of source photos to draw from is a double edged sword. Having a massive amount of photos could result in a fabulous high-fidelity 3-D mesh, or a terrible 3-D mess.
More photos means more detail, but it also creates more chances for error, and makes it more difficult to hunt for that one problematic photograph in the batch. Personally, I’ve found a photogrammetric sweet spot for most objects to be in the 100-130 photo range. More complex objects will naturally require more.
*NOTE*: For creating Digital Elevation Models and working in Geological Surveying, many thousands of photos are taken to capture the data and detail which is required.
10 – Photogrammetry Software
Pick the photogrammetry software, which best suits your needs. I like Autodesk ReCap Photo, because the software is dead simple and processing happens in the cloud, therefore there is no need for dedicated hardware. Whatever their setup is, they will always be able to process more photos faster than most lone enthusiasts.
Plus, if it’s their hardware which is chugging through all your photos, that frees up your own hardware for other development tasks.
Don’t be afraid to scout around for the software that best suits your needs. There is certainly no shortage of photogrammetry packages to choose from.
Expert Drone 3D Photogrammetry Tip
Use Professional Software
When using a drone to create 3D photogrammetry maps or DEMS for Geological Surveying, it is very important to use top software which is specifically designed for the work. Below are 4 excellent providers of professional photogrammetry solutions. You can read another excellent article entitled “10 Best Photogrammetry Software For Creating 3D Models“. This article has great reviews and includes videos.
Pix4DMapper Photogrammetry – Their software converts images from any camera into accurate maps and models. It is built to work with all the latest DJI drones such as the Phantom 3, Phantom 4, Inspire 1 and Mavic Pro.
DroneDeploy – Provide a full solution to automatically creates high-resolution 3D map with geological survey level accuracy. On your drone using their software, you can set your flight path with a single click. The software automates the flight and captures all the aerial data you need. Their solution does all the processing for you including storing of your maps. You will have your map ready to go in minutes.
ESRI – Another big supplier of software solutions and have been around for decades in this geological surveying industry. Their Drone2Map for ArcGIS will create orthomosaics, 3D photogrammetry meshes and more from your drone captured still imagery within a few minutes.
Agisoft PhotoScan – This is a standalone photogrammetry software program, which performs photogrammetric processing of digital images and generates 3D spatial data. It is widely used in GIS applications, cultural heritage documentation and visual effects production as well as for indirect measurements of objects of various scales.
No to finish off, here is some videos some terrific information and photogrammetry tips. This first video is from Pix4D and shows you how to create photogrammetry maps using their software.
This next video takes you around the DroneDeploy photogrammetry solution. It’s extremely popular as it does a terrific job. It is also very easy to use.
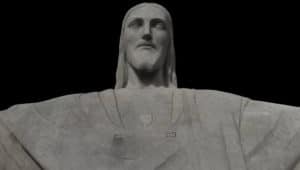
Now to finish off, we have a video on how the 3D photogram of the Christ The Redeemer statue was created.