Updating the Typhoon Q500 4k firmware along with the ST10 Remote Controller will add terrific new features to the quadcopter, improve it’s performance and even fix software bugs.
There is a bit of work if you haven’t updated the Q500 firmware before. Once you have done it once or twice, then it will become very easy to update the Typhoon 4k firmware and ST10 controller.
Here we will take you step by step on how to update the Q500 4k firmware along with some videos.
Typhoon Q500 4k Firmware Update Process
- Install the Q500 GUI software on your PC or Mac
- Download and install FTDI CDM USB drivers
- Download and install the latest firmware for the Q500 quadcopter and ST10 Controller
- Update Typhoon 4k firmware
- Update ST10 or ST10+ Remote Controller firmware
Next is the individual steps to update the Q500 firmware. At the end of this post we have an excellent video on updating the Typhoon 4k firmware.
How To Update Yuneec Typhoon Q500 4k Firmware
- You will need a tweezers and the USB stick for updating the Typhoon 4k firmware.
- First we need to download the Q500 GUI software. Click on this Yuneec Q500 download page.
- Choose the Windows or Mac version of the Q500 software and click on it. This will download the Q500 GUI software to your computer.
- Click on the download and follow the instructions to install the Q500 GUI software (next, accept licence agreement, next, next etc and finish).
- Open the Q500 GUI software on your computer.
- On the first screen, item 1 states “If your computer doesn’t have the USB driver installed, find the latest version here and install it, then restart your computer”. Now most computers have USD drivers installed so you may be able to skip this step. However, if you need USB drivers, then click the the link in that sentence.
- Clicking that link will bring you to the Virtual Com Port Drivers site. Look for your version of Operating System and click on it. For example, if you have a Windows 64 bit operating system, then click on the “Setup Executable” over on the right hand side. This will download FTDI CDM Drivers.
- When downloaded, click on the FTDI CDM package and follow the instructions to extract and install. (next, extract, next, next etc).
- Then go back to the Yuneec Q500 download page (link is above), scroll down the page and you will see “Drone Firmware”. This is latest version of the Typhoon 4k firmware. At the time of writing it is v1.07 for the quadcopter.
- Click on details and you would see a description of the improvements, new features etc which the Typhoon 4k firmware will add to the quadcopter.
- Click on Download. This will put the Typhoon 4k firmware onto your computer. Generally you will find it in your downloads folder.
- Next, download the ST10 or ST10+ Remote Controller firmware to your computer. This latest firmware build for the ST10+ is ST10+vO1b31c. The firmware is quite a large file with the latest version being 117 MB.
- After the download has completed, plug in the USB stick which came with the Typhoon 4k (remove the USB gimbal adapter wire from the USB stick).
- Next we need to connect the USB wire into the firmware update wire which is located in the battery compartment at the back of the Typhoon 4k quadcopter.
- Open the battery door and remove the battery. Look into the battery compartment opening and you will see a wire over on the right side. It is attached by Velcro. Use a tweezers to pull the wire out.
- Separate the 2 wires which you have just pulled out.
- Connect the USB cable from the computer into 1 of the 2 wires which you have just separated.
- Move the wires to the right and slip back in the Q500 battery.
- Next, with the Q500 GUI software open on your computer, switch on the Q500 quadcopter.
- The software will do a system test on the quadcopter.
- Click on Device Information which is on the left column of the Q500 software.
- Tap on Firmware Update.
- Browse to the location where you downloaded the Typhoon 4k firmware to. Click on the file and then click on open.
- Click Update. A progress bar allows you to see the Q500 firmware update moving along.
- At the end. click Finish and Restart the Q500 quadcopter.
- After the restart, then you can verify the Typhoon 4k is now up to date by going into the Device Information icon in the Q500 software.
- Now to finish off, you need to shutdown the Q500 quadcopter and remove the battery. Disconnect the USB cable, re-attach the 2 separated cables back together and push them back into the battery compartment. Then put back in the battery.
That is all there is to the Typhoon 4k firmware update. Next we will look at the firmware update process for the ST10 remote controller.
Note: If you need any components or accessories for your multirotor then check out our Typhoon Q500 4k parts, upgrades and accessories page.
How To Update the Yuneec ST10 Transmitter Firmware Instructions To Update the ST10 Transmitter Firmware
- Take your microSD card and slide it into the SD adapter and plug it into your computer.
- The ST10 firmware update which you downloaded earlier will be in a zipped folder.
- Unzip the folder. It will create a folder called “Firmware” and “update.zip”.
- It is important not to extract the “update.zip” file.
- Also the firmware document includes a folder called “tx”, which should never be renamed as this contains a very important file called the “st10plus_tx_b32.bin” file.
- Copy the “Firmware” and “update.zip” onto the empty microSD card. Copy them directly onto the microSD card. So don’t create a folder on the microSD card and copy them in there.
- Take the battery out of the ST10 controller and insert the microSD card into the slot.
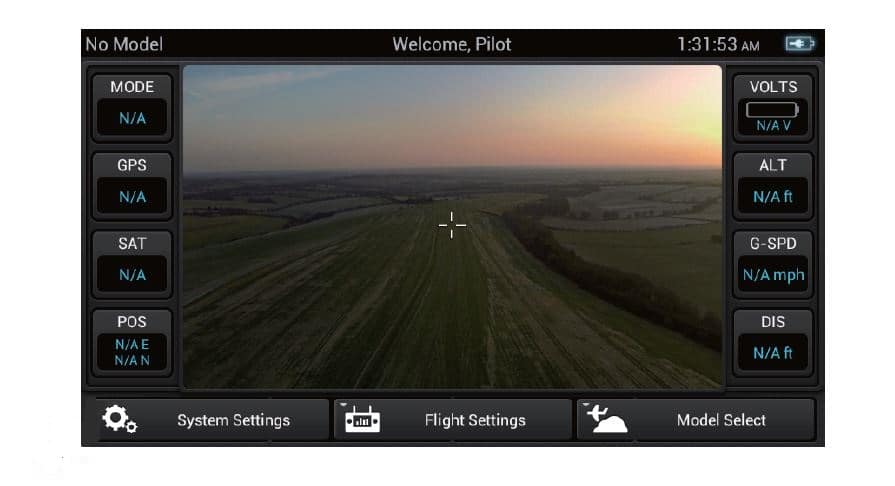
- Turn on the ST10+ Remote Controller, then select “System Settings” and click OK on the warning.
- Click “About Flight Mode Control”.
- Scroll down and select “Radio Control Update”.
- Select both the TX file and the RF file.
- Click “Update TX”. When completed click OK.
- Next click “Update RF”. When completed click OK.
- Click Finish.
- Next, select “System Update” and click OK.
- The update will take about 1 minute and then the ST10 controller will reboot.
- Check the “Build Number” to see if it is now at the latest version.
- Remember, to switch off the ST10 and remove the microSD card.
Here is a terrific video which show to update the Typhoon 4k firmware along with the ST10 transmitter.